
Preamble
I purchased off eBay a Dell 3008WFP monitor, a spare screen, control module and power supply unit, along which some spare cables and switches, for around £600 in 2012. It was working fine, although it had obviously been repaired, as the vendor was a Dell repairs department. I noticed that a hot of heat was generated from the rear top vent of the monitor when it was on. Then after a few months, one day, the monitor refused to turn on. The problem seems to be the infamous diode D22.
I searched for a solution and found the one below.
Note that this is an update of the previous blog on this topic, Fixing Dell 30″ monitor.
Notice
This has been taken from Overclockers How to repair a Dead Dell 3008WFP Monitor and reproduced here in case of link death, or the guide disappearing for some reason. I did not write this guide, although below I will add my observations.
There are also some extra tips, from the thread, provided by other users that I have tacked on to the end of the guide.
The guide
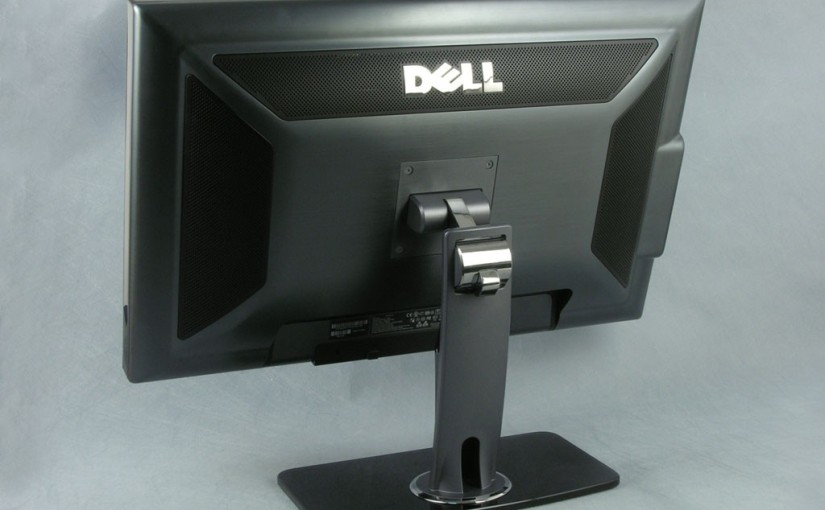
I have a Dell 3008WFP vA02.
If you wake up one morning like I did to find your monitor has no power. It is most likely because the diode D22 has blown. This is becoming a common problem with this model especially around the 4 year mark.
The part only costs under £3 pounds to replace so here is a “step by step” of how I repaired mine. I hope this helps others as this monitor is too expensive to throw out.
Thanks to Banano and all on this thread who helped me.
http://forums.overclockers.co.uk/sho…php?t=18444760
Also thanks to those over at badcaps who have a long thread on the subject.
http://www.badcaps.net/forum/showthread.php?t=14195
These videos will also help, but he makes getting the bezel off easy which is not the case.
https://www.youtube.com/watch?v=89Z8…feature=relmfu
https://www.youtube.com/watch?v=zKvAirYSqUM
—————————————————————-
You need to buy a STPS60170CT diode. You can get one from here..http://uk.farnell.com/stmicroelectro…4?Ntt=129-5334
The hardest part for me was removing the bezel. It is a real pain, but it does come off.
File down an old credit card on one edge so that you can pry away the bezel then use any other suitable tool to help. I used a bicycle lever.
When you have separated the bezel be careful because the power on/off is connected to it so do not separate too much.
Place some card at the edges to keep the bezel separated then turn it over. Again be careful when turning as the screen is no longer held in place.
Once turned over you can remove the back. Gently lift over the sockets and the whole back should come off. You then need to remove the metal backplates which are secured by screw’s and tape.
Remove the power connector lead (use a paper clip to pull the two brown levers on each side then it should pop out), then remove the inverter plug.
Gently lift up the main backplate which holds the power board. There are two sockets that need to be disconnected before you can completely take it off.
Once off turn it over and you will see the power board.
Remove the 4 screws that hold the power board at the back and the 5 screws that hold the board at the corners.
Lift it up (It might be stuck so you may need a bit of force) but be careful as it is connected by 2 sockets that need to be disconnected.
Now you have the power board separated, you need to remove the heatsink to gain access to the diode D22.
Remove the 2 screws on the top.
The heatsink is now connected by two corner solders and 2 diode’s. These all need to de-soldered from the power board.
Warming the board first with a hair dryer before de-soldering helps a lot.
De-soldered joints.
Heatsink removed
Where the heatsink was connected by the screws Dell has some kind of thermal paste. I removed this before removing the diode.
The diode D22 is clearly marked on the board. It needs replacing with the STPS60170CT diode.
You need to unscrew the diode from the other heatsink and de-solder it from the power board. Replace it with the new diode. Clip the ends to the right size and solder.
The old and new diode.
And….. you are done, well nearly.Not sure what the paste was on the heatsink but I used CPU thermal paste, before putting back the heat sink. Solder back the heatsink and the 2 diodes that you removed.
Put back the monitor back plates etc and …. You have your monitor working again.
Good luck.


Addenda
Additional notes from the thread
Second opinion
My Dell 3008Wfp went dark about 3 weeks ago, which by the way lasted 6 years. I knew immediately that it was something to do with the power supply, but I thought that there may be a fuse somewhere inside so I started searching the net on how to dismantle the monitor. Lucky me I came upon this thread that very day. Bought the Schottky diode took a week and a half to get here to Australia and commenced repairs.
At this stage I would like to thank “embalse” for his excellent repair guide, without which I would still be fumbling in the dark.
I have to emphasise that I am not an electrical engineer or electrician, I am a motor mechanic who merely had the skill to follow this guide.
I do not have a proper desoldering station, but used an 80 watt soldering iron with a 3mm tip and a hand vacuum plunger pump, and desoldering braid which I think was the most effective way to remove the solder.
The repair took me about 6.5 hours, which is not bad with the basic equipment that I had available. And now I have a fully working Dell 3008Wfp again.I wanted to share my personal experience of the repair itself and perhaps add a few extra pointers that don’t seem to be covered or were perhaps forgotten by embalse, yet may make repairs easier for others out there.
The removal of the bezel is the hardest part of the job as mentioned already, it is especially hard to remove around the corners. I used two plastic spatchulas. Remove the length of two adjacent sides of the bezel by hand and work your way towards the corner from both sides bit by bit. Try to pry and wedge the tool that you are using (spatchulas in my case) under the bezel as close to the corner as you can on one side and repeat on the adjacent side, there will be a pop and the corner will be freed. Repeat on all corners. The monitor in embalse’s pics is exactly like mine, however if you watch the youtube links he provided for dismantling, they are for the previous model of Dell 30 inch and cannot be used as a guide for taking off the bezel, because it is completely different.
When my bezel came off and I turned the monitor face down as in the pictures from embalse, for me the back refused to come away freely as described, in fact I had to stand it up on one of the long edges and while held in place by my helper (my 12 year old son) I had to use a screw driver to help it out of the casing, it seems that the card reader was getting caught on one side and the long metal screen was getting caught on the other side.When you get to the bit where you are lifting the main back plate that holds the power board and once disconnected the two cables, while lifting the unit you have to slide it to the left to unlock the hooks that hold the opposite side in place.
As mentioned the power board is held in place by 5 screws on the circuit side and 4 screws on the backing plate side, however there are also 2 screws on edge of the backing plate where the black power socket is held in place, these too have to be removed.
The power board will not come out because it is stuck in with a double sided heat transferring tape. You will have to heat the main backing plate under the power board with a heat gun or a hair dryer, when warm enough use a long flat head screw driver to wedge between the main backing plate and the heat sink and turn the screw driver this will separate the power board. My one was stuck in so hard that had I tried to lift it, I would have broken the circuit board.
The actual faulty diode once desoldered is held in place with a screw, it is not mentioned in the guide that this screw passes through the heatsink and through another diode on the other side of the heatsink where there is a nut on it. You will need to hold the nut with long nose pliers or tweezers while loosening the screw. The screw is not easy to get to as there is a capacitor in the way. And putting it back is much harder, you will have to try holding the nut in place while trying to get the screw to catch and there are capacitors in the way on both sides and not much room.
I bought a roll of aluminium tape from the local electronics store and was able to replace the ones removed, 50m roll cost $11.95AUD. The whole job was around 40 bucks all up, not bad considering that I bought my 3008Wfp brand new 6 years back for $2400AUD and the current equivalent Dell 30 inch is around $1500AUD.
If by any chance someone else out there runs into the same problem, I too have 4 more Schottky diodes that I can mail to the needy.
Thanks once more “embalse”. You’re the MAN!


A shortcut
I Actually found a shortcut that saves desoldering the 2 diodes that are on the heatsink,, I was able to remove the 2 top screws on the heatsink then slighly push the heatsink up,, this gave me access to the 2 diodes,, i then removed the screws and insulators, that way i only had to desolder the 2 joints that hold the heatsink on and not the 2 diodes aswell.
A third repair
I joined up so I could thank the OP and others for posting this thread. My second Dell 3008 died last week, the first was replaced under warranty but this time I was on my own.
Being in Australia I ordered 2 new STPS60170CT diodes from the US so I had a spare. All up the repair took me about hours I would guess. As mentioned removing the bezel is by far the most painful part of the job.
I found the key was push down the inside of the bezel while lifting from the outside to clear the clips holding it firmly in place.
I ended up desoldering both heat sinks off the power supply as I found it easier then trying to unscrew the old diode with it in place.
Anyway here are the pictures I took while I was doing the repair, note I replaced all the thermal paste, alloy heat tape, and double sided tape while I was at it.
So thanks again, saved me $1850, which is what Dell Aus charge for the new 30″ model. All up the repair cost me about $100. Bargin!!!
Mat


The bezel
The only thing I would add is that removing the front bezel is actually a lot easier than people think. You just need to lift up and towards the centre from the INSIDE of the bezel (hook fingers under it where it meets the LCD and pull hard!)
Exactly like this guy is doing here at around the 40 second mark.
My observations
blah

I did the same steps, but my monitor goes into color cycle (in a strange way). The colors fall slowly from the top of the monitor in thin lines. Can you please tell me what am i doing wrong.
LikeLiked by 1 person
Huge thanks for this article. I just repaired one of my two 3008 WFPs that died during the summer. (“Thanks” Microsoft for turning on my computer for five days to fail to install an update while I was on vacation.) The fix worked on the first try. Was a fun experience. Took approximately 3h to disassemble the monitor and 1h to put together. The front frame is the most difficult part and then there is actual soldering if you’re not used to that.
Again, big thanks gr33 and other sources and reddit. You saved me a ton of trouble and money. New diode cost 2.50 USD.
LikeLike
This helped me fix a 3008wfp that indeed turned out to have a blown D22 diode. Desoldering was a real PITA, I ended up buying a (low end) desoldering station to get it done properly. Wick was not working because the heat of the iron was very effectively being pulled away by the heatsink.
To get the bezel off by pulling on the inside, I put a credit card shaped piece of plastic between the LCD and the bezel, in order to prevent hurting my fingers. I might be removing it differently than explained, though, but perhaps this is of use to someone.
Big thanks!
LikeLiked by 1 person
Hello, can you help me please, I need a very, very clear picture of the power supply of the DELL 3008WFB monitor so that I can fix it because the IC L6599D exploded and all the other components next to it Thank you very much and keep you healthy and happy Thanks again
LikeLike
Hello, can you help me please, I need a very, very clear picture of the power supply of the DELL 3008WFB monitor so that I can fix it because the IC L6599D exploded and all the other components next to it Thank you very much and keep you healthy and happy Thanks again
LikeLike
Yes I certainly can, but unfortunately you will have to wait until April 2022 as I currently have no access to the monitor due to COVID reasons. When I have access, I will update the photos and notify you.
LikeLike